Saturday, January 30, 2010

Universal Serial Bus – what is it?

The USB has a port connection often located at the rear of the computer and these days there are one or two provided on the front of the cabinet. Most computers have a USB port that is used to connect various types of peripherals to the computer system. USB brings Plug and Play capabilities to peripherals connected outside the PC. These peripherals are automatically configured when attached to the USB port and a reboot is not necessary to use the component. A few examples are the portable hard disks, the pen drive or flash drive, net connect cards provided by Internet service providers etc.

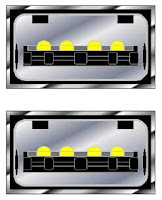
Example of USB Ports


Theoretically, you can daisy chain (connect various devices to each other in series) 127 devices to each USB port. However, in reality any more than five devices require a USB hub. The current USB specification, version 2.0, supports a data transfer rate of 480 Mb/sec. Version 2.0 is backward compatible with earlier versions 1.1 and 1.0 that used 12 Mb/sec. and 1.5 Mb/sec. rates.

USB is a continually evolving technology, as evidenced by the announcement of USB 3.0. USB 3.0 increases the speed rating of external devices by ten times that of USB 2.0, transferring data at 4.8 Gb/sec. USB 3.0 will be fully compatible with 2.0 and 1.1 devices.

In addition to wired USB solutions, there are recent innovations in Wireless USB (WUSB). WUSB allows for USB 2.0 speeds to devices within three meters of a computer. Wireless USB works similarly to Bluetooth, but features a reduced range to support higher transfer speeds.

We cannot imagine a system without an USB port these days! I personally use an USB port to transfer photographs from my digital camera, for synchronizing data between the internal hard disk and the external hard disk, occasional use of pen drive, to insert the Bluetooth dongle, wireless modem, the mouse and the keyboard, etc.

Troubleshooting printer tips

These days there are network printers in use. Many of the times when there is need for quick printing in situations like- in the midst of meetings and conferences at short notice, we find that the prints are not coming out of the printer. Many of us feel that the printer many manufacturers are to be blamed for the shabby work. Let’s face the reality that we never have the time to read the voluminous manuals that are provided by the manufacturers. Here you can find step by step solutions to common printing jobs using a network printer.
· Ensure that the printer is powered on and there are sufficient papers loaded in the printer. Also ensure that the power cord and the network cable is snugly fixed in the printer port, both ends at the computer as well as the printer (this is not required in case of Bluetooth operated network printers.
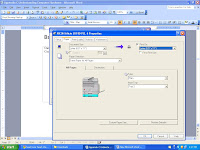
· Select the document you want to print and open it. Select Ctrl +p and pops out the fig .1on your screen.


Fig. 1
· In fig .1 above see to it that the status is set to idle or ready. Select the page no. you want to print or all the pages whatever. Now click on the properties in fig.1 and the fig.2 pops up.

Fig.2
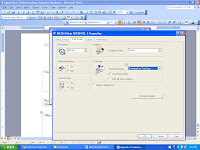
· Select whether you want to print on one side or on both sides of the paper by clicking on the dropdown box under duplex .Select the orientation whether you want to print in portrait form or landscape form. Next click on the paper option of fig.2 and pops out fig.3


Fig.3
· Here it is very important to select the document size by using the dropdown menu. Also select the print on box by clicking on it and select the suitable size of the paper. In the printer diagram shown in fig.3 click the mouse on number 1 or 2 to select one of the trays. Make sure that the same kind of paper is fed in the tray as you want the output. Suppose you want A4 print, load A4 paper physically in tray 2 of the printer and select 2 with the mouse on the printer diagram in fig.3. You can see how it looks in fig.4


Fig.4


Fig.5
· If you select print quality you can find the quality options by clicking on the suitable options and finally click ok. The fig.1 comes back again on the screen. Select the number of copies you want to print ok and you would get super clean printouts without any interruption.

Monday, January 18, 2010

Removal instructions for older versions of Backdoor.SubSever

CAUTION: Follow these instructions only if the instructions in the previous sections did not remove the Trojan.

To remove this Trojan, you need to do the following:
1. Restart the computer in Safe mode.
2. Remove the following registry key that was placed there by the Trojan:

HKEY_LOCAL_MACHINE\SOFTWARE\Microsoft\Windows\CurrentVersion\Run\System Traylcon

3. Restart in MS-DOS mode, and then delete the \Windows\Systemtrayicon.exe file.
4. Restart Windows, and then rename the Watching.dll file.
'
The details for each of these steps follows:

Restart the computer in Safe mode
Before you edit the registry, you need to restart Windows in Safe mode. This can take several minutes.

NOTE: In Safe mode, Windows uses default settings: VGA monitor, no network, Microsoft mouse driver, and the minimum device drivers required to start Windows. You will not have access to CD-ROM drives, printers, or other devices.

Questions n Answers about subseven

How does the Trojan get on the computer?
SubSeven is usually sent as a program that you think you want. It almost always has an .exe extension, and it will often be disguised as an installation program, such as Setup.exe. When this program runs, it will usually just return a "Failed" error message, but it can sometimes do something, such as play a game or appear to install the software. We strongly recommend that you only install programs received from trusted sources.

How does someone else know that this is on the computer?
Backdoor.SubSeven can be configured to email your IP address, and the port on which the server is running, to the person who sent it to you. It can also send out an alert through some messaging programs.

What are some of the symptoms of a computer that is infected with the Backdoor.SubSeven Trojan?
Any of the following symptoms will occur only while connected to the Internet:
· CD-ROM drive opens at random times
· Wave (.wav) files play for no reason
· Strange dialog boxes appear
· Internet downloads are very slow
· Files appear or disappear

Backdoor Trojan Horse -Removal instructions:

To remove Backdoor.Subseven you need to do the following:
· Run Update to make sure that you have the most recent definitions.
· Run a full system scan, making sure that antivirus software is set to scan all files.
· Make a copy of the Regedit.exe file with the .com extension (if necessary).
· Remove the references added to the Win.ini and System.ini files.
· Remove the references added to the Windows registry.
For detailed instructions, see the sections that follow.

NOTES:
· This is a random-name file creator. We will use the example Eutccec.exe in this document. Please substitute the randomly named file that you find on the system.
To run Update and then scan with AV software
Run Update, and then run a full system scan. Make sure that Antivirus is set to scan all files.

NOTE: If you cannot do this because you cannot run program files, go first to the section titled To copy Regedit.exe to Regedit.com; otherwise, skip to the section titled To edit the registry.

To copy Regedit.exe to Regedit.com:
If you cannot run program files, then you must copy Regedit.exe to Regedit.com; otherwise, skip to the next section.
1. Do one of the following, depending on which operating system you are running:
o Windows NT/2000/XP
1. Click Start, and click Run.
2. Click Browse, and then browse to the \Winnt\system32 folder.
3. Double-click the Command.com file, and then click OK.
1. Type copy regedit.exe regedit.com and then press Enter.
2. Type start regedit.com and then press Enter.
3. Proceed to To edit the registry.

NOTES:
· The Registry Editor will open in front of the DOS window. After you finish editing the registry and have closed the Registry Editor, then close the DOS window, as well.
· After BackDoor.Subseven has been successfully removed, then you may delete the Regedit.com file.
To edit the registry

CAUTION: It is strongly recommend that you back up the system registry before making any changes. Incorrect changes to the registry can result in permanent data loss or corrupted files. Please make sure you modify only the keys specified in this document.
1. Start the Registry Editor if necessary:
o If you performed the procedures in the previous section, then the Registry Editor is already open. Skip to step 4.
o If it was not necessary to perform the procedures in the previous section, then proceed to step 2.
2. Click Start, and click Run. The Run dialog box appears.
3. Type regedit and then click OK. The Registry Editor opens.
4. Navigate to and open the following key:

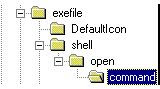
HKEY_LOCAL_MACHINE\Software\Classes\exefile\shell\open\command

CAUTION: Do not inadvertently modify the HKEY_LOCAL_MACHINE\SOFTWARE\Classes\.exe subkey. Changes made to that key can prevent .exe files (program files) from running. Be sure to navigate to the HKEY_LOCAL_MACHINE\SOFTWARE\Classes\exefile\shell\open\command subkey as shown in the following figure.


5. Double-click the (Default) value in the right pane.
6. Delete the current value data, and then type: "%1" %* (quote-percent-one-quote-space-percent-asterisk.)

NOTE: The Registry Editor will automatically enclose the value within quotation marks. When you click OK, the (Default) value should look exactly like this: ""%1" %*"

Make sure that you completely delete all value data in the command key prior to typing the correct data. If you accidentally leave a space at the beginning of the entry, any attempt to run program files will result in the error message "Windows cannot find .exe." If this happens to you, then start over at the beginning of this document, making sure to completely remove the current value data.

7. Navigate to and select the following key:

HKEY_LOCAL_MACHINE\Software\Microsoft\Windows\CurrentVersion\Run

8. In the right pane, look under the Name column, and delete any of the following values if you see them:

WINLOADER, Win32nt, Win32.Bin, WinCrypt, WinProtect, Win, xTnow, Ayespie,
PowerSaveMonitor, rundll32

NOTE:Other values may appear, which are not on this list. Deleting values from this location does not prevent the programs from running; it only prevents them from starting automatically when Windows starts.

9. Navigate to and select the following key:

HKEY_LOCAL_MACHINE\Software\Microsoft\
Windows\CurrentVersion\RunServices

10. In the right pane, look under the Name column, and delete any of the following values if you see them:
WINLOADER
Win32nt
Win32.Bin
WinProtect
Win
xTnow
Ayespie
PowerSaveMonitor
rundll32

NOTE: Other values may appear, which are not on this list. Deleting values from this location does not prevent the programs from running; it only prevents them from starting automatically when Windows starts.

11. Exit the Registry Editor.

Edit Windows startup files

1. Click Start, and click Run.
2. Type the following command, and then press Enter to open the System Configuration Editor.
sysedit
NOTE: If you see the message "Windows cannot find .exe", then repeat steps 1 through 6 in the previous section, and make sure that you typed the text exactly as shown. If you do not see an error message, then proceed to the next step.
3. Close the Autoexec.bat and Config.sys windows in the System Configuration Editor.
CAUTION: The steps that follow instruct you to remove text from the load= and run= lines of the Win.ini file. If you are using older programs, they may be loading at startup from one of these lines. The Trojan adds lines such as load=c:\windows\temp\pkg2350.exe or run=hpfsched msrexe.exe. (In this example, hpfsched is a legitimate program, but msrexe.exe is part of the Trojan). It may also modify the shell= statement, for example, to shell=explorer.exe pwrsvm.exe

If you are sure that the text contained in these lines are for programs that you normally use, then we suggest that you do not remove them. If you are not sure, but the text does not refer to the file names shown, then you can prevent the lines from loading by placing a semicolon in the first character position of the line. For example:
; run=accounts.exe
4. Locate the load= line within the [windows] section of the Win.ini file; it is usually located near the top of the file.
5. Position the cursor immediately to the right of the equal (=) sign.
6. Press Shift+End to select all of the text to the right of the equal sign, and then press Delete.
7. Repeat steps 4 to 6 for the run= line, which is usually beneath the load= line.
8. Close the Win.ini window, and click Yes when you are prompted whether to save the changes.
9. Locate the shell=explorer.exe line within the [boot] section of the System.ini file; it is usually located near the top of the file.
10. Position the cursor immediately to the right of explorer.exe.
11. Press Shift+End to select all of the text to the right of explorer.exe and then press Delete.
12. Close the System.ini window, and click Yes when you are prompted whether to save the changes.

NOTE: Some computers may have an entry other than explorer.exe after shell=. If this is the case, and you are running an alternate Windows shell, then change this line to shell=explorer.exe for now. You can change it back to your alternate shell after you have finished this procedure.

13. Exit the System Configuration Editor.
14. Click Start, point to Settings, and click Control Panel.
15. Double-click the Display icon.
16. Click the Screen Saver tab, and then change the currently selected screen saver. If it is set to (None), then select any of the available screen savers. The important thing is that you make a change to the current setting.
17. Click OK, and then close the Control Panel.
This completes the removal part of the process. Even if you did so previously, start antivirus and run a full system scan. Delete any files found to be infected with Backdoor.Subseven. When finished, restart the computer.
Backdoor Trojan Horse - overview

Backdoor.SubSeven is a Trojan horse, similar to Netbus or Back Orifice. It enables unauthorized people to access your computer over the Internet without your knowledge. When the server portion of the program is running on a computer, it is possible for the person who is accessing the computer remotely to do the following:
· Set it up as an FTP server
· Browse files on that system
· Take screen shots
· Capture real-time screen information
· Open and close programs
· Edit information in currently running programs
· Show pop-up messages and dialog boxes
· Hang up a dial-up connection
· Restart a computer remotely
· Open the CD-ROM
· Edit registry information

When it is run, BackDoor.Subseven makes the following changes to the system:
· Drops (adds) a copy of itself and a randomly named executable file, such as Eutccec.exe, to the \Windows or \Windows\System folder.
· Adds the dropped file to the load= and run= lines of the Win.ini file.
· Adds the dropped file name to the shell=explorer.exe line of the System.ini file.
· Creates the WinLoader value and sets it equal to the dropped file name in the following registry keys.
· Modifies the (Default) value from "%1" %* to, for example, eutccec.exe "%1" %* in the following registry keys:

HKEY_LOCAL_MACHINE\Software\Classes\
exefile\shell\open\command

HKEY_LOCAL_MACHINE\Software\Microsoft\
Windows\CurrentVersion\Run

Boot Process explained in simple steps:

A Computer is designed to start in a predictable way from the moment you press the Power On button until the moment the operating system loads. The list below outlines the steps.
1. Power good signal is sent to the CPU -> When you press the Power On button
2. CPU looks at ROM for basic instructions (BIOS)-> When CPU receives power good signal
3. System BIOS loads
4. BIOS initiates Power-On Self Test (POST)
5. POST checks RAM and then Video. If either of these have a problem, there are various beep codes. -> Typically, a procession of long single beeps for RAM; one long and two short for video. Motherboard documentation contains beep codes
From this point forward, errors are reported with text messages displayed on the monitor.
6. When RAM and Video pass the POST test, a single beep occurs. The single beep exists simply to indicate that the diagnostic speaker is working. A malfunctioning speaker will prevent audible beep codes. -> You will begin to see text on the screen. The rapid numbers flashing indicate an in-depth RAM check. The screen will indicate the BIOS manufacturer and version number.
7. POST then checks keyboard. -> If an error occurs, a text message generally displays the on-screen
8. Legacy and then Plug and Play devices are identified -> The data gathered is then stored on the CMOS chip
9. CMOS data is queried against new current configuration data. Drives spin, lights flash, and sounds are heard. -> If there is a problem with the CMOS battery, you will get a text message.
10. Finding no major hardware errors, BIOS turns the process over to the boot loader.
11. The boot loader learns the boot sequence from the BIOS (e.g. A: C: CD-ROM, etc.) and looks for the Master Boot Record (MBR) on that device.
For hard disks, the boot loader looks for a partition table. The partition table will have a pointer to the MBR on the primary, active partition
12. The MBR contains the first file needed to start the operating system (IO.SYS in Windows 9x, boot.ini in NT).
13. The whole process is turned over to the OS and you see splash screens, etc.

Monday, January 11, 2010

Flush Out System Viruses

There are times when we encounter disturbance on a PC that is intermittent and erratic. Even after troubleshooting everything we can at the hardware, firmware (bios) & driver levels, we might feel a little lost. Some viruses can infect your system all the way down to the “System BIOS”.

These are generally called “WORM” or “BIOS” viruses and are considered to be “STEALTH”.
Undetectable by your VIRUS Protection Software, go ahead and SCAN anyway. Still the virus doesn’t seem to go away.

The ONLY solution is to remove the virus. Unfortunately, you will have to REFORMAT your system.
NOTE: This means you will have to backup your DATA!

Here are the STEPS:

1. REMOVE any existing PARTITIONS on your Hard Disks using FDISK, SETUP or NUKEM.

2. Dissipate the CMOS battery. Refer to your Motherboard Manual for instructions.
Open CASE, locate CMOS battery, remove battery, locate JUMPER adjacent to battery area, place JUMPER on pins 2 & 3, power on PC, power off PC, return JUMPER to pins 1 &2, replace the CMOS battery.

3. Power on PC, enter SETUP (DEL or F2), select LOAD SETUP DEFAULTS to restore the BIOS settings, setup your HDD type (select AUTODETECT IDE), select MAIN to set the TIME & DATE, save & exit SETUP. The PC reboots.

4. Insert OS BOOT DISK; boot PC to OS BOOT DISK; partition your HDD with FDISK then, POWER OFF for 20 seconds.

5. Reboot OS BOOT DISK; use FDISK to clear the Master Boot Record. (e.g.. FDISK /MBR)

6. Format your HDD (e.g.. FORMAT C: /S/U)
NOTE: If FORMAT reports: INVALID DRIVE SPECIFIED – The previous step kicked a virus out of the master boot record, repeat from step #2, you must have forgot a step.

7. Reload your OS.